It’s Friday. How did that happen? The 4 day hiatus I took was not planned but I think the result of the summer wall I’ve hit and bad planning/packing while we took a quick trip to Leavenworth earlier this week. Regardless I missed posting and am haaaaaapy to be back to share this fun kid friendly craft!
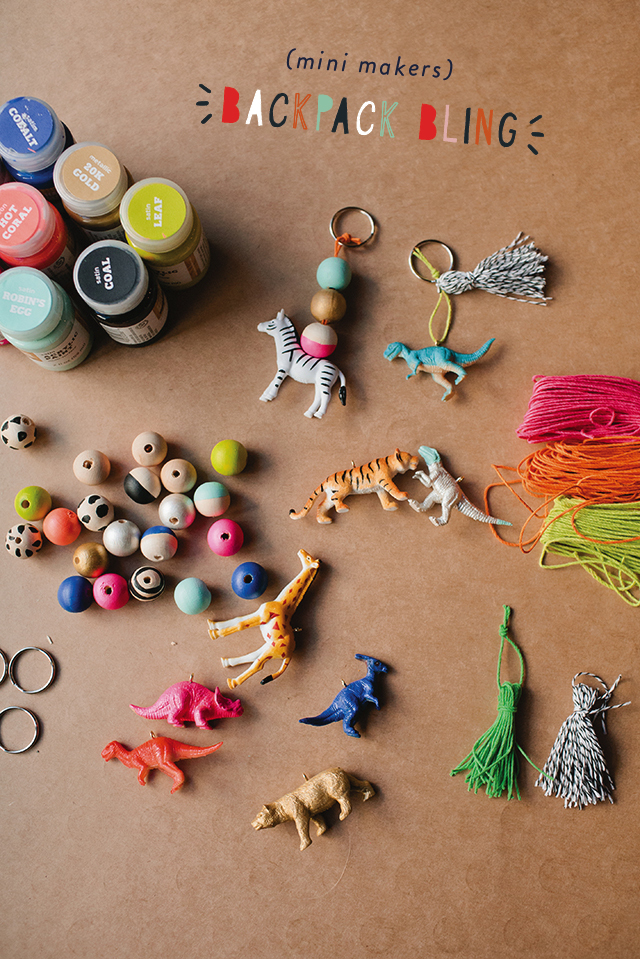
I really love seeing all the styles and accessories that trend during the preschool and elementary years. One of the things that Tilly got into last year was collecting trinkets to hang from her backpack. It was cute and she had a lot of fun with it so I thought some bright and colorful handmade charms would be the perfect touch for her bag this year. She made a bunch to share with friends as well and Griffin got into it too.
(Little man can hardly wait to sport is backpack bling on the first day of preschool! Bag from the big boy section at Target)
It took us an hour or so to prep and paint everything, with a few things needing a second coat later in the day and then 30+ minutes to pick the combos and string everything. Griffin (4 y.o.) needed lots of hands-on help but Tilly (6 y.o.) did most steps on her own.
Supply list and how to, below!
You’ll Need:
- Acrylic paint (love the hand made modern sold at Target)
- Plastic animals (grabbed a bag of jungle animals and dinosaurs at the craft store)
- String or twine (colored hemp pictured – also used twine)
- 3/4 inch. wood beads (from craft store)
- Key rings (from the jewelry making section at the craft store)
- Eye screws (also from the jewelry section at the craft store)
- Tiny finishing nail and hammer or drill-bit and drill
Here’s How To:
- Using your nail and hammer or drill, make a hole in an animal. Screw in an eye screw. Repeat on the rest of the animals.
- Paint beads and plastic animals as you wish. Set aside to dry. We strung the beads onto wood skewers as we went to dry.
- Make tassels if you wish.
- Touch up paint.
- Cut string to about 12 inches long. Once paint is dry, thread through the screw eyes on the animals. Add beads and tassels as you wish and finish with a key ring. Tie a knot at the end of the string and trim excess.
- Add to the zippers on your backpacks or gift to friends (and aunties!)!
They turned out just as cute, if not cutter in real life as they look in pictures and would be equally adorable as a pint-sized necklace or bracelet if you have supplies leftover.
If you have any other back to school needs, here’s a few other posts on the subject:
 1. BTS fashion show activity // 2. mom + mini bus stop style – dad + mini bus stop style // 3. favorite lunch combos // 5. everyday DIY, BTS series I did with mom.me awhile back. videos 1 2 3 4 5
Happy weekend!
XO, Rae
(images by Stacy Jacobsen)


thank you for this great idea! we are going to get some animals and have some fun this week-end – the new bag definitely needs some extra ‘oumph’!
xoxo — have fun!
Wow! I love this idea! I’m going to try it with a twist.
Thanks so much!